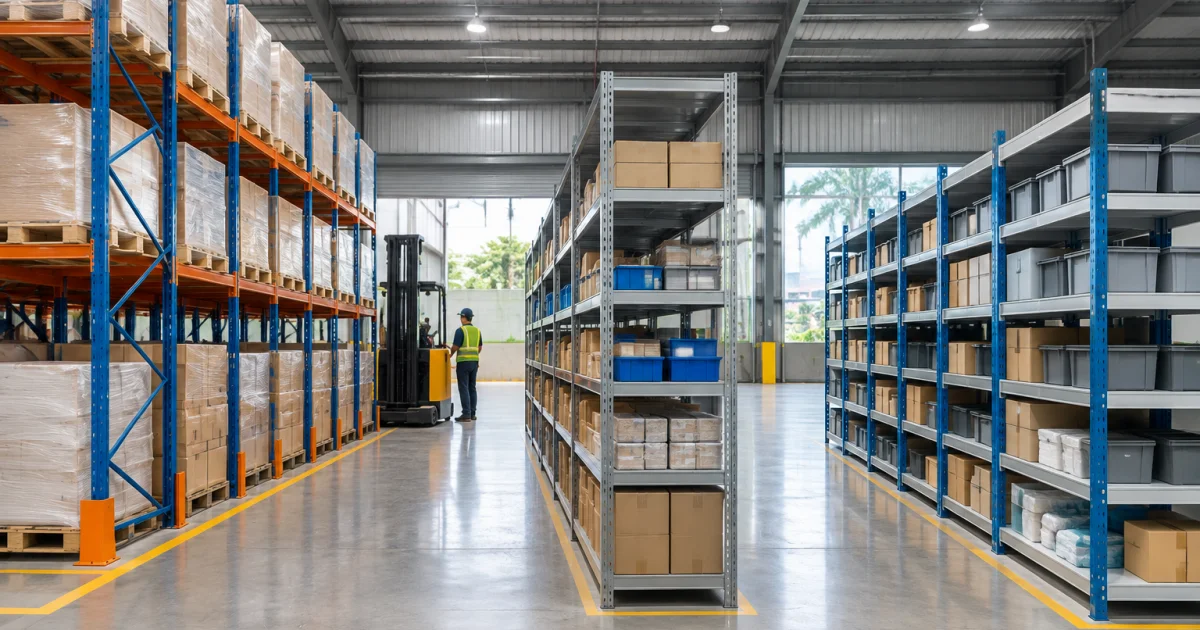
When you’re choosing a Rack Malaysia suppliers offer, the most common mistake is starting with the rack type (“pallet rack” or “boltless rack”) instead of starting with your operation. A rack is a tool: it should match what you store, how you move it, and how fast you need to access it. Get the match right, and you improve space utilisation, picking speed, and safety. Get it wrong, and you create congestion, damaged stock, and expensive rework.
This tutorial is written for SME owners and facility teams fitting out warehouses, storerooms, and retail backrooms in Malaysia. We’ll walk through a practical selection process that connects three decision pillars:
- Load: what weight the rack must safely carry (including how that weight is applied)
- Space: floor area, clear height, aisle widths, and building constraints
- Access method: how you pick or replenish (hand-pick, pallet in/out with forklift, high-turn FIFO, etc.)
By the end, you’ll know what to measure, what questions to ask, and how to compare options like selective pallet racks, drive-in racks, shelving racks, mezzanine floors, and more—without relying on vague labels.
Step 1: Define your “unit load” (what exactly will sit on the rack)
Before any layout or quotation, get precise about the unit load you’re storing. In practice, the rack doesn’t hold “inventory”; it holds pallets, cartons, bins, tyres, drums, or mixed items on shelves. The unit load determines the rack structure, beam levels, shelf decking, and the safety margins you need.
Checklist: what to capture for each SKU group
- Dimensions: length × width × height of the stored unit (pallet size, carton footprint, tote size, etc.)
- Weight: average and maximum (don’t estimate from one sample)
- Load distribution: evenly distributed vs point loads (e.g., machine parts that stress one area)
- Packaging strength: can cartons be stacked, or will they crush?
- Storage orientation: will pallets be stored lengthwise or crosswise on beams?
- Handling method: hand-pick, pallet jack, reach truck, counterbalance forklift, stacker
- Environmental needs: humidity, corrosion risk, cold room, dusty production area (affects finishes and maintenance)
Practical example: A parts distributor stores mixed cartons. The heaviest carton is 28 kg, but most are 8–12 kg. If staff hand-pick, a medium duty longspan system is often more productive than pallet racking because it allows access to every carton without using equipment. But if those cartons arrive on pallets and you’re replenishing full pallets weekly, a hybrid approach—pallet rack for reserve and shelving rack for pick faces—may reduce labour.
Step 2: Calculate load rating the right way (not just “heavy duty”)
Load rating is not one number. For most industrial racking, you’ll see ratings such as UDL (uniformly distributed load) per shelf, per beam level, and per bay/upright. What you need depends on how the load transfers into the structure.
Know the three load levels that matter
- Per level: total weight on one shelf/beam pair (e.g., 2 pallets on one level)
- Per bay: sum of all levels in one bay (upright capacity depends on height and bracing)
- Point loading / decking: if you store small feet loads, drums, or uneven cartons, you may need decking (wire mesh, steel panels, timber) to spread the load
Practical example: You plan to store 1,000 kg pallets, two pallets per level. That’s 2,000 kg per level. If you stack 4 levels, the bay could carry around 8,000 kg (plus rack self-weight). But if the pallets are not standard and overhang, or the forklift frequently impacts the uprights, you’ll need additional safety features like upright protectors and stronger column profiles. Always validate the specification for your actual pallet size, handling equipment, and beam span.
Common load-rating pitfalls to avoid
- Using average weights instead of maximum (your rack must be safe at worst case)
- Ignoring dynamic effects (forklift placement, shock loads, accidental impacts)
- Mixing products over time (today’s SKU mix may get heavier—design for growth)
- Assuming “heavy duty rack” means any weight (ratings vary widely by design)
If you’re comparing quotations, make sure the supplier states the rating clearly (per level and per bay), along with assumptions (beam span, pallet placement, shelf type). This is also where a professionally engineered racking system is worth it: it should be designed around your loads, not “one size fits all”.
Step 3: Measure your space like a planner (height, obstructions, and floor condition)
Space planning is more than fitting rectangles into a floor plan. To choose the right warehouse racking system, you need accurate measurements and constraints that affect safe operation.
What to measure on site
- Clear height to the lowest obstruction (sprinklers, beams, ducting, lighting, cable trays)
- Column grid and wall offsets (columns can dictate aisle alignment)
- Door locations, roller shutter heights, dock leveller areas
- Fire exits and required access routes (keep them clear in layout)
- Floor condition: cracks, slopes, drainage channels, floor joints
- Floor loading considerations for very high-density storage or mezzanine floor systems
Why floor flatness matters: Racking frames must be plumb. Uneven floors require shimming and careful installation. If you plan tall pallet racks, small deviations become larger at height, affecting beam alignment and pallet placement.
Think vertically: when a mezzanine floor is the better “rack”
If your operation is limited by floor area but has unused clear height, a mezzanine floor can create extra space for light storage, packing stations, kitting, or offices—without expanding the building footprint. This is especially practical for SMEs with growing e-commerce fulfilment or parts assembly areas where items are hand-picked and the vertical height is better used as a second level rather than taller racks.
A mezzanine is not automatically the best answer; it depends on load, workflow, and building constraints. But it’s a key option to consider during selection, not as an afterthought.
Step 4: Choose your access method first (selectivity vs density vs speed)
Your access method is the bridge between “what you store” and “how the rack should work.” The right rack is the one that supports your daily movement: receiving, putaway, picking, replenishment, and dispatch.
Four common access patterns and what they imply
- 100% selectivity (every pallet accessible): best for many SKUs, lower pallet quantities per SKU; often selective pallet racking
- High density (store more in the same footprint): best for fewer SKUs with higher quantities; options include drive-in, push-back, or flow systems
- FIFO replenishment: when expiry dates matter (food ingredients, FMCG); gravity flow lanes support first-in-first-out
- Hand-pick / piece-pick: best served by shelving rack, longspan, or boltless racks at ergonomic heights
Rule of thumb: If you frequently need “any pallet, any time,” prioritise selectivity. If you need “maximum pallets per square metre” and you can accept batch access, prioritise density. If you need “fast picking” of cartons/parts, prioritise ergonomics and pick-face design.
Practical example: the same building, three different answers
- Spare parts store (thousands of SKUs, low quantities): longspan shelving with clear labelling and pick bins. Add a small reserve pallet rack zone for bulk cartons.
- Beverage distributor (few SKUs, high volume): high-density pallet storage can reduce footprint, but confirm your forklift type and turning radius.
- Electronics assembly (kitting and WIP): medium duty racks near workstations plus a mezzanine floor for light overflow storage and packing.
Step 5: Match rack type to your load + space + access (selection guide)
Now you can match your requirements to the right category. Below is a practical guide to common rack and shelving options used in Malaysia, and when each makes sense.
Selective pallet racking (most common warehouse pallet system)
Best for: Many SKUs, frequent access to individual pallets, predictable putaway/picking.
- Pros: High selectivity, easy to reconfigure, straightforward operation
- Considerations: Requires aisles; density depends on aisle width and truck type
- Good fit when: You have mixed inventory and need operational flexibility
If you’re unsure where to start, selective pallet racking is often the baseline to compare against other options. You can then decide if you need more density or more picking efficiency.
Drive-in racking (high density, batch access)
Best for: High quantities per SKU, limited SKU variety, where you can store pallets in lanes.
- Pros: High storage density; fewer aisles
- Considerations: Lower selectivity; forklift enters the rack; higher impact risk; typically LIFO unless designed/managed otherwise
- Good fit when: You run batch-based inventory and can manage lane discipline
Because forklifts travel inside the structure, robust design and protection features become more important (guide rails, upright protection, operating practices).
Push-back racking (density with better selectivity than drive-in)
Best for: Medium to high density where you want multiple pallets deep but still want faster access than drive-in.
- Pros: Higher density than selective; pick from the aisle; can be faster to operate
- Considerations: Typically LIFO; higher system complexity; needs consistent pallet quality
Gravity flow systems (FIFO and high-throughput)
Best for: FIFO requirements, high-throughput distribution, expiry-managed goods.
- Pros: Supports FIFO; separate loading and picking aisles; efficient replenishment
- Considerations: More complex; requires good maintenance; needs consistent pallets and operational discipline
Medium duty longspan shelving (cartons, bins, parts)
Best for: Hand-picked cartons and parts, storerooms, maintenance stores, retail backrooms.
- Pros: Flexible shelf heights; strong for medium loads; good visibility and access
- Considerations: Aisle planning for trolleys; needs good location control if SKU count grows
This is where many SMEs upgrade from ad-hoc shelving: you gain consistent bays, defined locations, and easier expansion.
Light duty / boltless racking (fast setup, flexible for light loads)
Best for: Small stockrooms, office archives, tools, retail backroom items, e-commerce packing consumables.
- Pros: Easy to assemble and adjust; cost-effective for lighter loads
- Considerations: Not ideal for heavy point loads or forklift environments; confirm shelf rating and stability
Retail gondola racks (customer-facing + backroom consistency)
Best for: Supermarkets, pharmacies, hardware stores, and showrooms needing display plus organised replenishment.
- Pros: Designed for merchandising; adjustable; supports planogram changes
- Considerations: Choose end caps, accessories, and backroom shelving to match replenishment flow
If you’re planning both sales floor and storage, align the backroom storage racks with how items replenish the gondola—this reduces double handling.
Step 6: Plan aisle widths, equipment, and picking flow (so the rack actually works)
A rack that “fits” on paper can still fail operationally if aisles are too tight, receiving blocks picking routes, or replenishment conflicts with dispatch. This step turns your rack selection into a workable layout.
Start with your material-handling equipment
- Hand-pick only: narrower aisles may work, but ensure safe passing space and emergency routes
- Pallet jacks/stackers: need turning space at aisle ends and clear staging zones
- Forklifts/reach trucks: aisle width depends on truck type, load length, and turning radius
Instead of guessing aisle widths, describe your equipment to the supplier and ask them to design to those operating clearances. If you plan to change truck type later (for example, moving to reach trucks to reduce aisle width), design the racking system so it can adapt.
Design the flow: receiving → storage → picking → dispatch
Even a small warehouse benefits from simple zoning:
- Receiving/staging near doors and docks, with short travel into storage lanes
- Fast movers positioned closer to dispatch or at lower levels
- Pick faces arranged to minimise walking and backtracking
- Returns/quarantine area to keep exceptions from clogging aisles
Practical example: A retailer uses the backroom for both storage and online packing. If packing tables are placed in the main aisle, replenishment blocks picking. A better approach is to allocate a dedicated packing zone (possibly under a mezzanine floor) and keep the primary aisle clear for restocking.
Step 7: Safety, durability, and compliance basics to confirm before buying
Racking safety is not optional. It’s also not just about having “strong steel.” Safety depends on correct design, correct installation, correct operation, and ongoing maintenance.
Specification checks you should request
- Load rating documentation (per level and per bay) aligned to your unit loads
- Anchoring method suitable for your floor condition
- Protection accessories: upright protectors, end-of-aisle barriers, guide rails (especially for forklift zones)
- Decking choice appropriate to cartons vs pallets vs irregular loads
- Installation quality: plumb, level, braced correctly; beams seated and locked properly
Operational habits that protect the system
- Never exceed rated loads and avoid “temporary overloading” during peak seasons
- Train operators on safe pallet placement and speed control near uprights
- Inspect regularly for impact damage, missing safety pins, and bent frames
- Keep aisles clear to prevent collisions and to maintain evacuation routes
If you operate in multiple states or plan expansion, prioritise a supplier who can support consistent standards and maintenance across sites.
Step 8: Use a simple selection worksheet (and compare suppliers fairly)
Once you know your loads, space, and access method, it becomes much easier to compare options from different suppliers. The goal is to avoid comparing “apples to oranges,” where one quote assumes lighter loads, fewer levels, or no accessories.
A quick worksheet you can copy into your RFQ
- Inventory profile: number of SKUs; pallets/cartons per SKU; fast/slow movers
- Unit load details: max weight; dimensions; pallet type/quality
- Access needs: selectivity vs density; FIFO needs; picking method
- Space constraints: clear height; columns; doors; staging areas
- Equipment: forklift/reach truck type; pallet jack; expected traffic
- Growth plan: expected increase in pallets/SKUs; ability to add bays or levels
- Deliverables requested: layout drawing, load calculations/ratings, installation scope, maintenance support
How to read quotations more intelligently
- Confirm what “capacity” refers to (per shelf, per level, per bay)
- Check beam spans and upright profiles (small differences change performance)
- Look for included accessories (protectors, decking, signage) vs optional add-ons
- Validate the layout: does it include realistic aisles and staging space?
Tip for SMEs: If your operation is mixed—some pallets, some cartons—ask for a combined plan using both pallet racking and shelving rack zones. Many businesses try to force one rack type everywhere, then end up with bottlenecks.
Where to go deeper (useful internal guides)
If you want supporting perspectives as you shortlist options, these resources may help you refine your decision:
- Selecting the right racking system for different operations
- How to choose a heavy duty display rack for business use
- Tips for selecting supermarket racks and backroom layouts
Conclusion: the “right rack” is the one your workflow can use every day
Choosing the right rack in Malaysia comes down to disciplined basics: define your unit loads, calculate ratings properly, measure your site constraints, and pick an access method that matches how you actually work. From there, the rack type becomes an outcome—selective pallet racking for high selectivity, high-density systems when space is tight and SKUs are limited, shelving racks for hand-picking, and mezzanine floor solutions when vertical space can unlock growth.
If you do these steps before requesting quotes, you’ll get proposals that are easier to compare, safer to operate, and far more likely to support your next phase of expansion.
Frequently Asked Questions
What’s the difference between a shelving rack and pallet racking?
A shelving rack is typically designed for hand-picked items like cartons, bins, and parts, with loads distributed across shelves. Pallet racking is designed to store palletised loads and to be served by material-handling equipment (like forklifts), with beams and uprights rated for heavier loads and higher lift heights. Many SMEs use both: shelving for pick faces and pallet racking for bulk reserve stock.
How do I know if I need a heavy duty rack or medium duty racking?
Start from your maximum unit load and how it sits on the rack. If you store palletised loads or very heavy cartons/parts per level, you likely need a heavy duty racking system. If your team hand-picks cartons and parts and the load per shelf is moderate, medium duty systems like longspan are usually more practical and ergonomic. Ask the supplier to state the load rating per level and per bay in writing, based on your maximum weights.
When should I consider a mezzanine floor instead of adding more racks?
Consider a mezzanine floor when you have unused clear height and your activities suit a second level—such as light storage, packing, kitting, or office/records areas. It’s especially useful when adding more racks would create crowded aisles or when your growth is limited by floor area rather than height. The right choice depends on loading requirements, workflow, and building constraints.
What access method should I choose: selective, drive-in, push-back, or flow racking?
Choose selective racking when you need access to any pallet at any time and you have many SKUs. Choose drive-in when you need very high density and can store pallets in lanes with fewer SKUs (batch access). Choose push-back when you want multiple pallets deep while still operating from the aisle (typically LIFO). Choose flow racking when FIFO and high-throughput replenishment matter, such as expiry-managed goods.
Can Mr Space help design a racking system layout for my warehouse in Malaysia (including Johor)?
Yes. Mr Space provides end-to-end support—from site measurement and layout planning to manufacturing, supply, professional installation, and maintenance. If you’re evaluating options such as selective pallet racks, shelving racks, high-density systems, or mezzanine floor solutions, sharing your unit loads, space constraints, and access method helps the team propose a layout that fits your operation and future growth.
Need help choosing the right racking setup for your space?
Mr Space designs and manufactures storage solutions in-house—so you can match load rating, available space, and access method with confidence. Share your site dimensions, inventory profile, and handling equipment, and our team can recommend the right mix of pallet racking, shelving racks, mezzanine floor systems, or custom layouts—then supply, install, and support the system as you scale.


