Choosing a Boltless Rack Malaysia setup can seem as simple as measuring a corner and ordering a rack. In practice, the right boltless rack depends on what you store, how often you pick items, whether you use bins or cartons, and how safely each shelf can carry loads over time.
This starter guide covers bay sizing (height, width, depth), shelf-level planning, and safe-loading basics for storerooms, offices, workshops, and SMEs that want adjustable storage without costly rework later.
What “boltless rack” means (and when it’s the right choice)
A boltless rack is shelving that assembles without traditional nuts and bolts, typically using interlocking uprights and beams with shelf panels or decks. The main advantage is fast assembly and easy reconfiguration, so shelf heights can change as your stock changes.
Boltless racking is commonly used in:
- Office file and archive rooms (boxes, files, stationery)
- Workshops (tools, spare parts, consumables)
- Retail backrooms (cartons, bin storage, small appliances)
- Light industrial storerooms (maintenance items, components)
When it may not be the best fit: for palletized loads handled by forklifts, pallet racking is usually required. If you need very high capacity per level, a heavy duty rack or engineered industrial shelving may be more appropriate than a light-duty boltless bay.
Within the broader Storage Racks Malaysia category, boltless racks sit in the “hand-loaded, quick-to-adjust shelving” segment—ideal for mixed items and frequent changes.
Step 1: Size the rack bay correctly (height, width, depth)
Correct sizing prevents avoidable issues: cartons that don’t fit, aisles that become cramped, or bays that block doors and service panels. Start with height, width, and depth.
Height: use vertical space without making picking unsafe
Measure floor-to-ceiling height and note obstructions (sprinklers, lights, ducts). Choose a rack height that leaves clearance above the top shelf and doesn’t require lifting heavy items above shoulder height.
- Light items (files, small bins): higher top shelves can work.
- Heavier items (cartons, parts): keep frequently picked stock between waist and chest height; avoid heavy loads on top levels.
If floor space is tight, plan vertical storage early so you don’t end up with a messy, inefficient layout later.
Width: think in “bays” and protect aisle access
Boltless racks are planned in bays placed side-by-side. When choosing width:
- Match the bay width to your typical storage unit (e.g., two cartons side-by-side plus a small clearance).
- Set aisle width based on movement (hand-carry vs. trolleys or pallet jacks).
- Keep access to switches, fire equipment, and service panels—don’t rack over them.
A practical approach is to size bays around your most common carton/tote/bin so each shelf stays tidy and space isn’t wasted.
Depth: match the deepest item you store (and avoid overhang)
Depth is often overlooked. Overhang can crush packaging and increase fall risk; too much depth can waste space and create “double rows” that hide stock behind stock.
- Cartons and bins: choose a depth that fits fully with a small finger gap for handling.
- Tools/parts: consider bins and label-friendly layouts to keep items visible and countable.
Depth also affects stability: deeper shelves can support awkward loads better, but only when installed correctly and kept within rating.
Step 2: Plan shelf levels for workflow (not just “more shelves”)
More levels aren’t automatically better. Plan shelves around picking, replenishment, and stock checks. Start by separating fast-moving vs. slow-moving items, and light vs. heavy.
Start with a simple shelf map
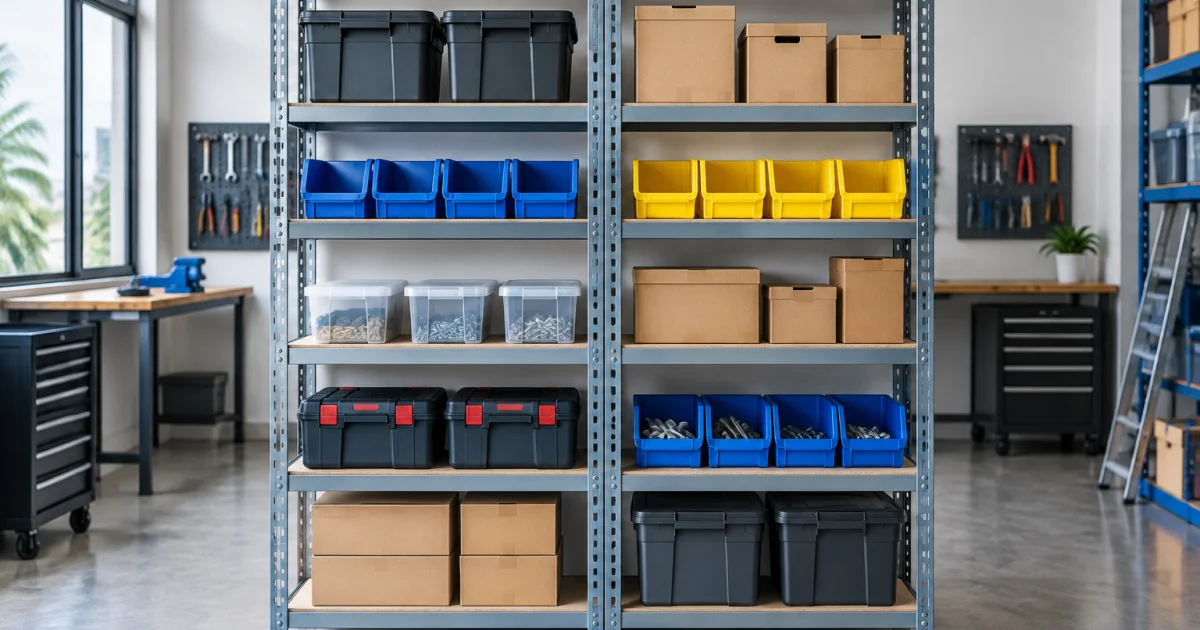
- Bottom level: heavy items, bulk cartons, or tools (use a barrier if moisture/dust is a concern).
- Middle levels: fast-moving SKUs and daily-use parts (the ergonomic “gold zone”).
- Upper levels: slow-moving stock, archives, seasonal items.
This reduces unnecessary lifting and keeps frequently picked items within easy reach.
Adjustability: leave “growth gaps”
Boltless shelving is adjustable—use that advantage. Leave extra vertical space on selected levels for future carton heights, new bins, or bundled packs. If every shelf is set to a tight fit on day one, you’ll be forced to reconfigure more often than necessary.
Don’t forget picking and replenishment clearance
Plan shelf spacing for handling, not just item height. A 300 mm carton may need 330–350 mm to slide in/out without crushed boxes or scraped hands. The same applies to bins with lips or handles.
Step 3: Safe loading basics—how to avoid bowing, collapse, and falling items
Safety depends on the rack’s rating, correct assembly, and daily loading habits. Two racks can look similar but perform very differently under real use.
Understand load rating terms (simple definitions)
- Per shelf/UDL (uniformly distributed load): max load per level when weight is spread evenly.
- Bay capacity: total load across all shelf levels in a bay.
- Point loading: heavy weight concentrated in a small area (e.g., one corner), which can exceed safe stress even if total weight seems acceptable.
When comparing a Shelving Rack Malaysia supplier’s options, confirm whether ratings are per level (UDL), what shelf material/deck is assumed, and whether your use involves dense bins or concentrated loads.
Load placement rules you can apply immediately
- Heaviest items down low to improve stability.
- Spread weight across the shelf; avoid corner pile-ups.
- Keep items within the shelf footprint to reduce knock and fall hazards.
- Use bins for loose parts to prevent roll-offs and losses.
- Keep aisles clear to reduce accidental impacts.
What causes shelf bowing (and how to prevent it)
Bowing usually comes from overload, point loading, and long-term stress. Reduce risk by using decks/panels suited to your item density, reserving heavy storage for lower levels, and inspecting shelves periodically. If you see permanent deflection, reduce the load or adjust the layout.
Stability and anchoring: when to secure the rack
Stability improves when bays are aligned, connected in runs, and secured where appropriate. If the rack is tall/narrow, carries heavier items, or staff frequently pull from upper levels, discuss suitable stabilizing measures with your supplier/installer.
Step 4: Choosing the right duty class (light, medium, heavy) for your items
Duty class isn’t only about total weight—it’s about how weight is applied (evenly spread vs. concentrated) and how dense your items are. List your heaviest items and how they’ll be stored (loose, bins, cartons, stacked).
Light-duty boltless racking: best for offices and small stock
Suitable for files, stationery cartons, light tools, and mixed small items. It’s a common choice for office stores and small retail backrooms because it’s easy to adjust and keep organized.
Medium duty rack options: for denser cartons and parts storage
If you store heavier cartons or dense components (bearings, fasteners, machine parts), a medium duty rack with stronger beams and shelves is often a safer, stiffer option while keeping the same hand-picking workflow.
When you should step up to heavy-duty shelving or pallet racking
If your “hand-loaded shelving” starts to resemble pallet storage, reassess. For heavier industrial loads, consider heavy-duty shelving or pallet racking designed for forklift operations. Mr Space supplies multiple racking categories so you can match the system to your operation instead of forcing everything into boltless bays.
Step 5: Practical buying checklist (to get the right quote the first time)
To get an accurate quote quickly, prepare:
- Room dimensions and obstacles (doors, columns, panels).
- Intended layout: number of rows, aisle widths, straight run vs. L-shape.
- Item list: top heaviest items and typical carton/bin sizes.
- Handling method: hand carry, trolley use, ladder access, replenishment frequency.
- Shelf count per bay and how often you need adjustability.
- Safety preferences: edge protection, anti-tip measures, housekeeping rules.
For a broader comparison of racking types, see Storage Racks Malaysia: Choosing Safe, Efficient Solutions for Your Warehouse. For supplier evaluation questions (design support, installation, after-sales), see The Ultimate Guide to Choosing a Racks Supplier in Malaysia.
Conclusion: a boltless rack is “simple” only when it’s sized and loaded correctly
The best boltless rack setup fits your cartons and bins, supports real loading patterns, and improves daily picking. Start with correct bay sizing (height/width/depth), plan shelf levels around workflow and ergonomics, and follow safe-loading habits like keeping heavy items low and spreading weight evenly.
Share your space measurements and item details with a supplier to confirm whether boltless is sufficient—or if medium-duty, heavy-duty, or other storage systems will deliver better safety and value.
Frequently Asked Questions
How do I choose the right boltless rack size for my storeroom?
Start with what you store (carton/bin sizes and the heaviest items), then size the bay depth so items don’t overhang, the bay width so cartons fit neatly, and the height so the top levels are still safe to access. Also plan enough aisle space for the way you move stock (hand-carry or trolleys).
How many shelf levels should a boltless rack have?
Choose shelf levels based on workflow, not just maximum shelf count. Keep fast-moving items between waist and chest height, heavy items on lower levels, and slow-moving stock on upper levels. Leave some extra vertical space on a few levels so you can reconfigure later without rebuilding the entire bay.
What does “UDL per shelf” mean, and why is it important?
UDL means uniformly distributed load—the maximum weight a shelf can carry when the load is spread evenly across the full shelf surface. It matters because concentrated point loads (a heavy object in one corner) can damage shelves even when the total weight seems within the limit. Always plan for your real loading pattern.
When should I choose a medium duty rack instead of a basic boltless rack?
If you store dense cartons or heavy parts (for example, machine components or packed spare parts) and you notice shelves bowing or the rack feeling flexible, a medium duty rack with stronger beams and shelves is often a better fit. It keeps the same hand-picking workflow but with higher stiffness and safer capacity.
Can boltless racks be used for warehouse pallets?
Boltless racks are generally intended for hand-loaded items like cartons, bins, and tools—not palletized loads handled by forklifts. If you need pallet storage, consider pallet racking systems designed for that purpose, where the structure, clearances, and load ratings match forklift operations.
Plan your boltless rack layout with Mr Space
Not sure which rack size, shelf spacing, or load rating fits your items? Mr Space provides end-to-end storage solutions—from measurement and layout planning to in-house manufacturing, supply, and professional installation. Share your space size and what you store, and we’ll recommend the right boltless, medium-duty, or heavy-duty shelving approach for a safer and more efficient storeroom.


